 |
 |
The Pay Employees and Vendors service allows you to make electronic payments to employees, vendors and others at any financial institution in Canada.
My Pay Employees and Vendors Profile & Preferences
 |
You may update your Pay Employees and Vendors profile at any time. Simply select “My Preferences and Profile” from the Self Service menu.
Changes you make here will not be automatically made to your Online Banking profile. | |
 |
Add/Edit Recipients - Step 1
 |
Organize your view by adding each recipient/payee to either My Employees, My Vendors or Others. | |
 |
Add/Edit Recipients - Step 2
 |
If you do not have a unique number to identify your recipient, you will need to create one here. How? |
 |
Choose whether you would like us to notify your recipient by e-mail before your payment arrives. |
 |
You have the option to set a default payment amount, which can be changed at any time before the payment is submitted. |
 |
Payments can be made anywhere in Canada, in Canadian or US Dollars. |
 |
To save your recipient’s information, select “Save” at the bottom of the screen.
OR:
Make a payment by clicking on Create a Payment. | |

|
Submit Payments - Step 1
You are now ready to make payments.
- Recipients will be listed under their appropriate groups.
- Select which recipients you would like to pay by ticking the boxes next to their names.
|
  |
Submit Payments - Step 2
Make changes prior to submitting
- Select the account you would like to use to make your payments.
- Select due dates for your recipients.
- You have the option to change the default payment amounts.
- Choose whether we should e-mail your recipient when the payment is due. You must have provided an email address when you first added the recipient to the Recipient List.
- Add optional reference information such as invoice numbers or comments for your recipients to view on their email notification if selected.
|

 |
Submit Payments - Step 3 (without SecurID* Token)
Confirm your payments
- Review all your payments to be submitted.
- Ensure all information and payment amounts are correct.
- Select Confirm
|

 |
Submit Payments - Step 3 (with SecurID* Token)
Confirm your payments.
- Review all your payments to ensure the information is correct and select “Confirm.”
 |
Enter the number displayed on your SecurID* Token and select “Submit.” | |

 |
Your transaction is complete
- You have the option to print this confirmation page for your records
|
  |
Manage your Payments
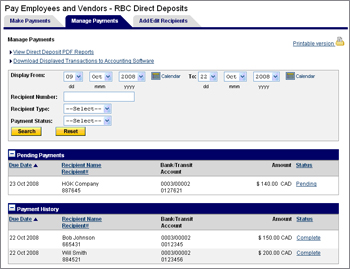
- Check the status of your payments – search by date range, recipient number, recipient type or payment status.
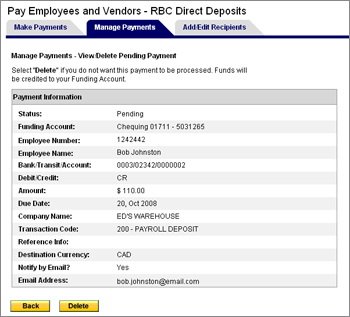
- You have the ability to delete payments that have a “Pending” status.
- If payments have failed at the destination bank the payments will be returned to you. Look in Payment History for payments with the Status of RETURNED. Funds will also have been credited back to your Funding Account.
- If a Notification of Payment Information Change has been received, look in Payment History for payments with the Status of NOC . You should validate the banking information with your recipient and update your Recipient List with the new information as soon as possible.
|

  |
Trace your payments
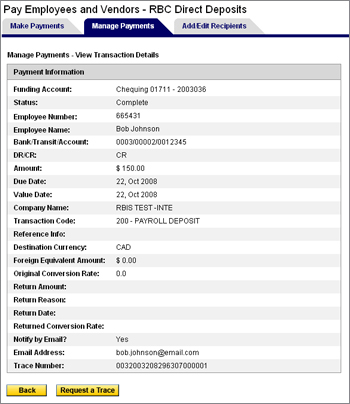
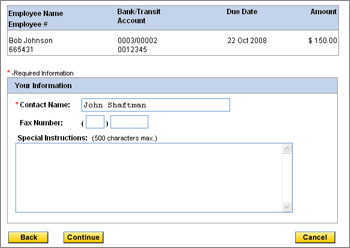
- If a payment did not appear in the recipient’s account and the status is “Complete,” you have the ability to trace your payment. .
- Your account will be charged $35 per trace request.
- Ensure you have allowed sufficient time prior to submitting a trace request. Some banks may take up to 3 business days to process a payment.
- Most trace request will be responded to between 3 to 10 business days and a response will be sent back to you via fax.
|

  |